
Beauty meets brawn at the driveway’s edge
Drive through New Fairfield, Connecticut, and you will spot a familiar scene. Solid granite borders line the edges of blacktop driveways, giving them a tidy outline and a touch of classic New England charm. Those stones are Belgian blocks, sometimes called granite cobbles, and they do more than look pretty. They protect your driveway from crumbling, keep grass where it belongs, and help slow erosion right where water likes to run. In short, they both protect and beautify.
There is a catch. Setting the blocks is not the last step. The finishing work matters just as much. Backfilling, which means refilling the trench around the newly installed blocks with soil and sometimes gravel, locks everything in place. It also supports drainage and gives your edge a finished look that reads as professional instead of halfway done. We will cover what Belgian blocks are, why homeowners love them, how to backfill step by step, and what to watch for in Connecticut, especially with freeze thaw cycles and typical New Fairfield soils. By the time you are done reading, you will know what a proper finish looks like, why it works, and how to keep it that way. And if the process feels like more than you want to take on yourself, landscaping company helps you with it — just visit https://yardgoats.io/ to get started.
What exactly are Belgian blocks, and why choose them for a driveway edge
Belgian blocks are quarried granite cut in rectangular shapes. Think chunky, squared cobbles with a chiseled face. They are common along driveways and walkways throughout the Northeast. Homeowners pick them for three big reasons.
1. A timeless look that fits almost any house
These stones bring a classic, slightly rugged texture that feels right at home beside a clapboard colonial or a clean lined contemporary. That crisp gray border against dark asphalt turns a standard driveway into something intentional, even elegant. The line looks finished, and curb appeal goes up. If you want that polished first impression when you pull in, Belgian blocks deliver it.
2. Durability that shrugs off weather and traffic
Granite is tough. It resists chipping, rotting, and warping. Compared with wood or plastic edging that can fail after a few seasons, granite holds firm through snow, plows, hot summers, and heavy tires. Many old New England streets that used granite are still serviceable, which says a lot. If you want a border that outlasts a few sets of tires, this material is hard to beat.
3. Clear definition and real function
Beyond the nice look, the blocks act as a physical restraint. They hold asphalt in place, keep gravel from straying, and stop your lawn from creeping over the edge. In winter, that line makes plowing and shoveling easier, because you can see where to run the blade. The border also reduces the chance that the pavement edge will unravel or crumble.
4. Helpful control of runoff
A row of stone slows sheet flow at the edge of the drive. Water does not gouge the lawn or wash fine soil out as easily. With smart grading and the right backfill, the edge becomes more than a decoration. It works as a simple curb.
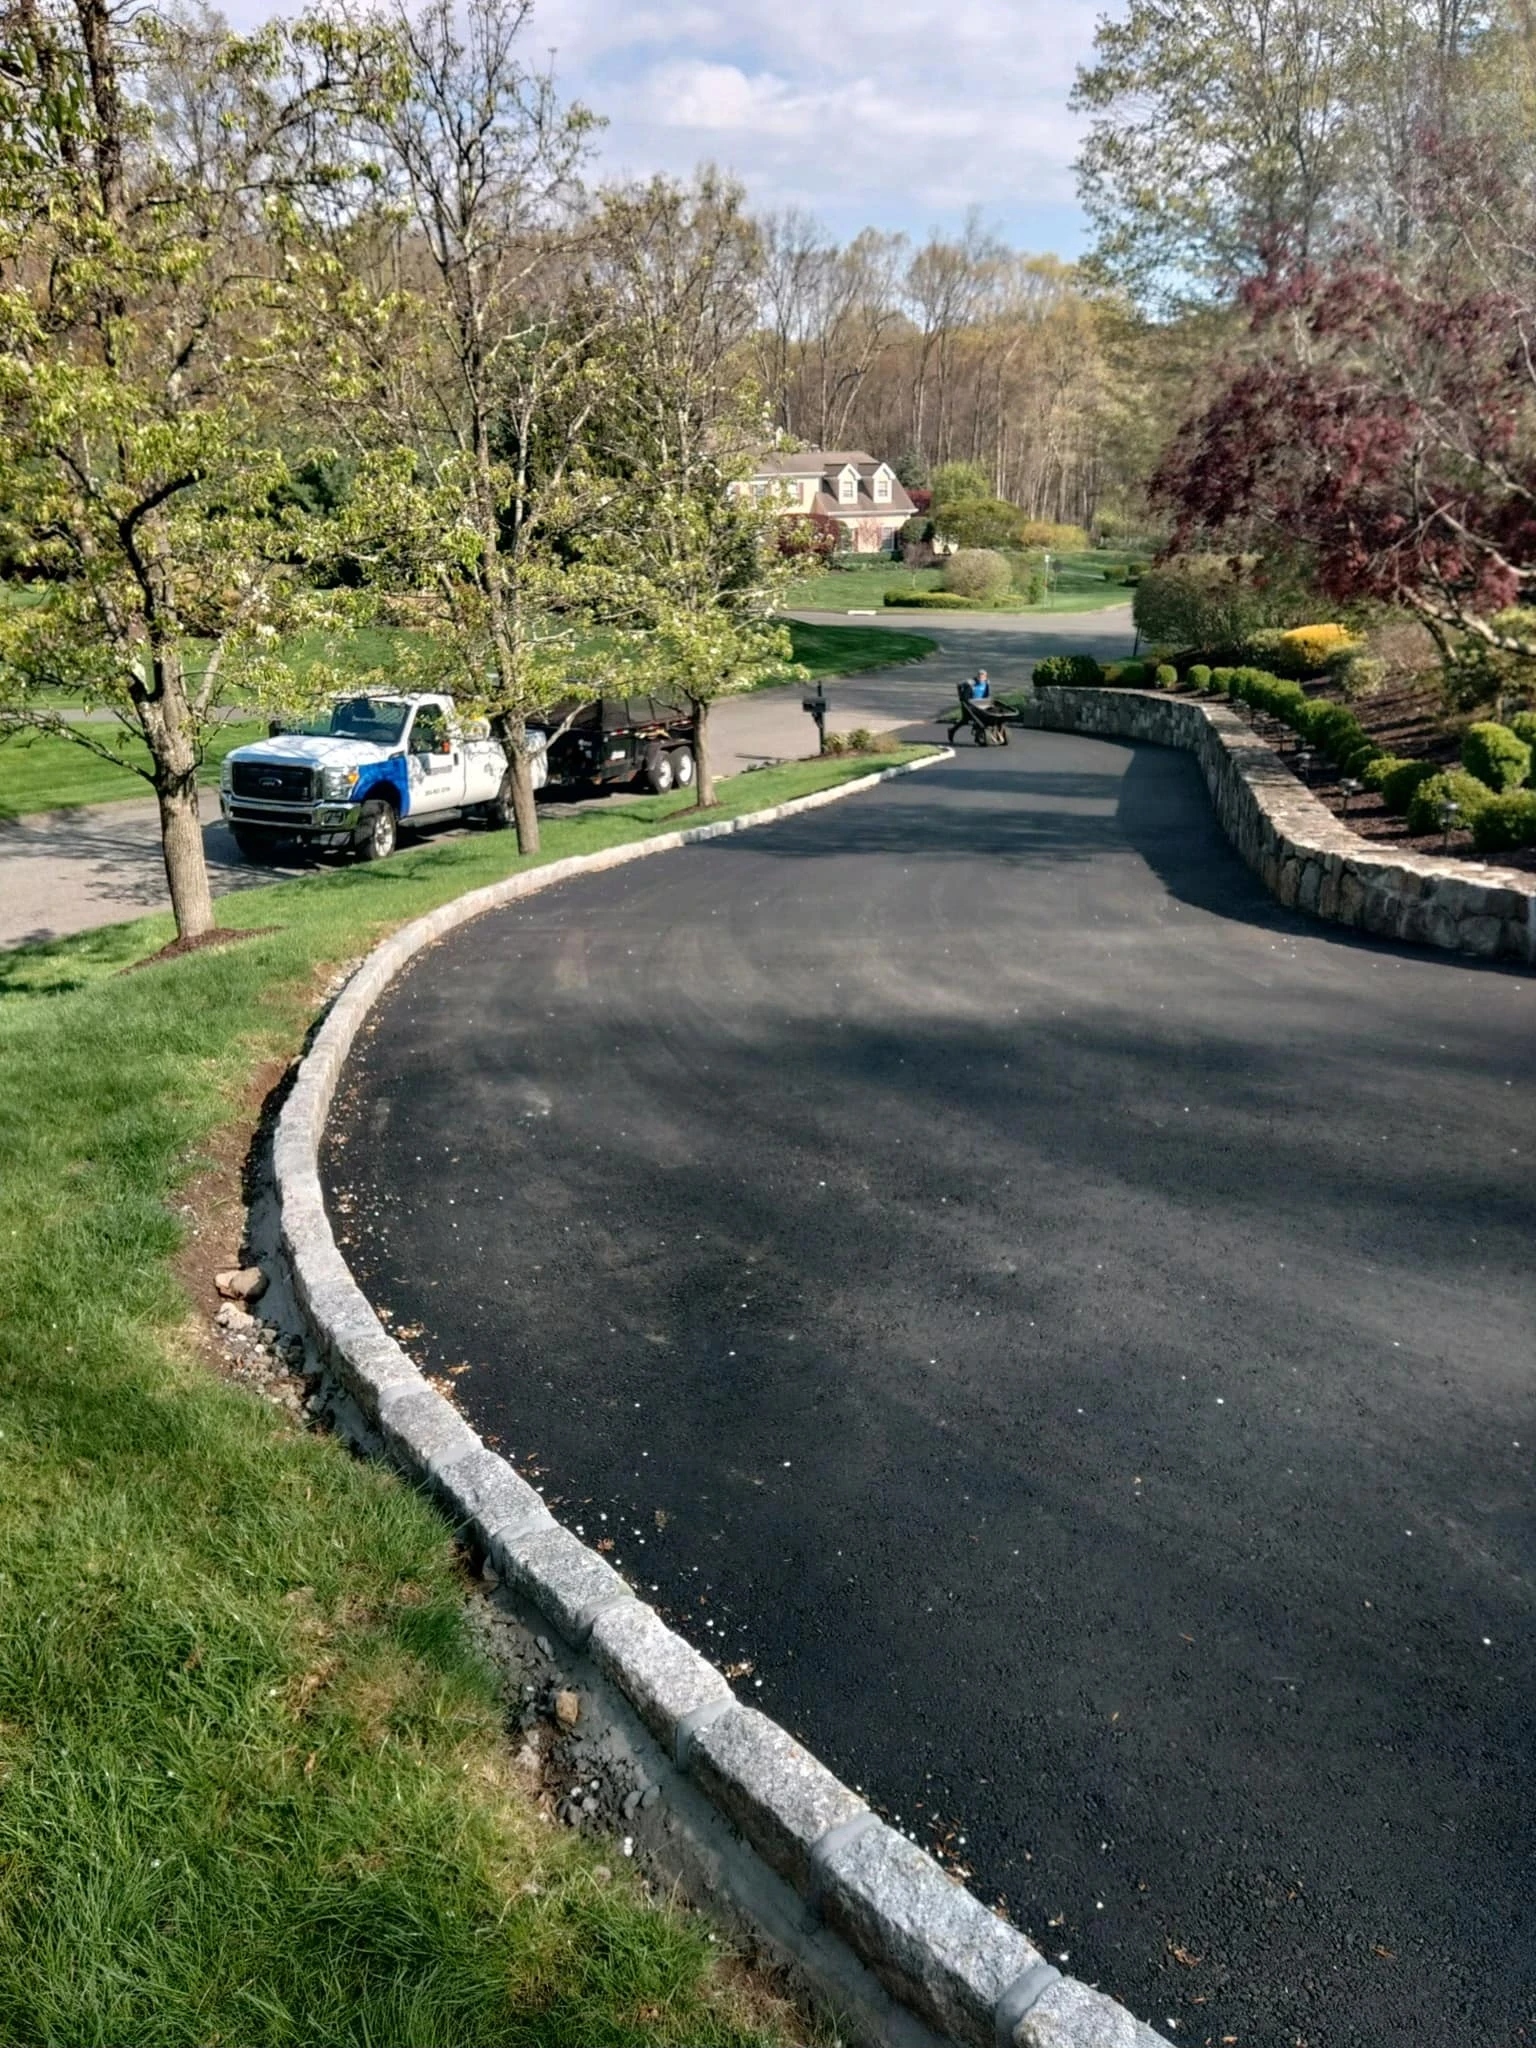
Photo courtesy of Yardgoats
The backfilling process that secures the blocks and finishes the look
If the trench around your stones is still open, the job is not complete. Backfilling is what braces the blocks and blends the edge into your yard. Here is a straightforward process that homeowners and beginners can follow. You can apply the same ideas whether your installer set the blocks in concrete, mortar, or a compacted base.
Step 1. Let the blocks set before you touch the trench
If a concrete or mortar bed was used, give it time. One day is a minimum for light handling, a few days is safer, and a full week before heavy use is common. Test by gently nudging a block. If it wiggles, it is not time yet. If the edging was dry set on a compacted base, you can proceed sooner. In Connecticut, most driveway edges benefit from a rigid setting method because of frost, but you can still dry set if the base is prepared correctly.
Step 2. Choose the right materials for backfill
Two materials matter most, and each has a job.
- Gravel or crushed stone. Place two to four inches behind the blocks. The goal is drainage and stability. Angular gravel interlocks and leaves pathways for water to move. That reduces frost problems and limits settlement.
- Topsoil. Use clean, good quality soil in the upper part of the trench. This lets you match the lawn grade and seed easily. If your excavated soil is rocky or poor, bring in fresh topsoil for the top layer.
If your property has clay heavy soil, which holds moisture, consider a little more gravel. If the soil is sandy and drains immediately, you can still use gravel, but the concrete bed and careful compaction become the key to keeping stones steady.
Step 3. Backfill in compacted lifts
Start with gravel. Pour it behind the blocks and tamp lightly with a hand tamper or the flat end of a 2x4. The gravel should support the blocks without pushing them forward. Then add soil in layers. Three to four inches at a time works well. Tamp each lift with a hand tamper or even the sole of your boot for small sections. Do not overdo it. The idea is firm, not brutal. Overly aggressive tamping can shift a newly set stone.
If you see a small gap between the front face of the block and the edge of the asphalt, fill that space too. Stone dust works well along a blacktop edge, or you can use dense grade material. This seals the seam so water does not sneak under the pavement.
Step 4. Shape the final grade
As you reach the top of the trench, shape the soil to match the lawn or planting bed. Aim for a reveal of roughly four inches of visible stone face. Bring the soil up close to the top of the block on the lawn side, then feather the grade into the rest of the yard. A slight slope away from the block helps water flow into the lawn. Rake the surface smooth. The last inch should be loose enough for seed to catch.
Step 5. Finish with seed or mulch
If the border meets lawn, spread grass seed and water gently. Cover lightly with soil, compost, or a thin layer of straw if you expect a downpour. If the border meets a planting bed, top the soil with mulch that matches the rest of the bed. Either way, nobody should see a raw trench or a ridge of rocky subsoil. The finish should look like it has always been part of your yard.
Step 6. Cure, settle, and touch up
Avoid driving right against the new edge for several days if concrete was used. After the first few heavy rains, walk the line with a rake and a bag of soil. If you notice slight settlement, add soil and reseed as needed. Small touch ups now save bigger fixes later.
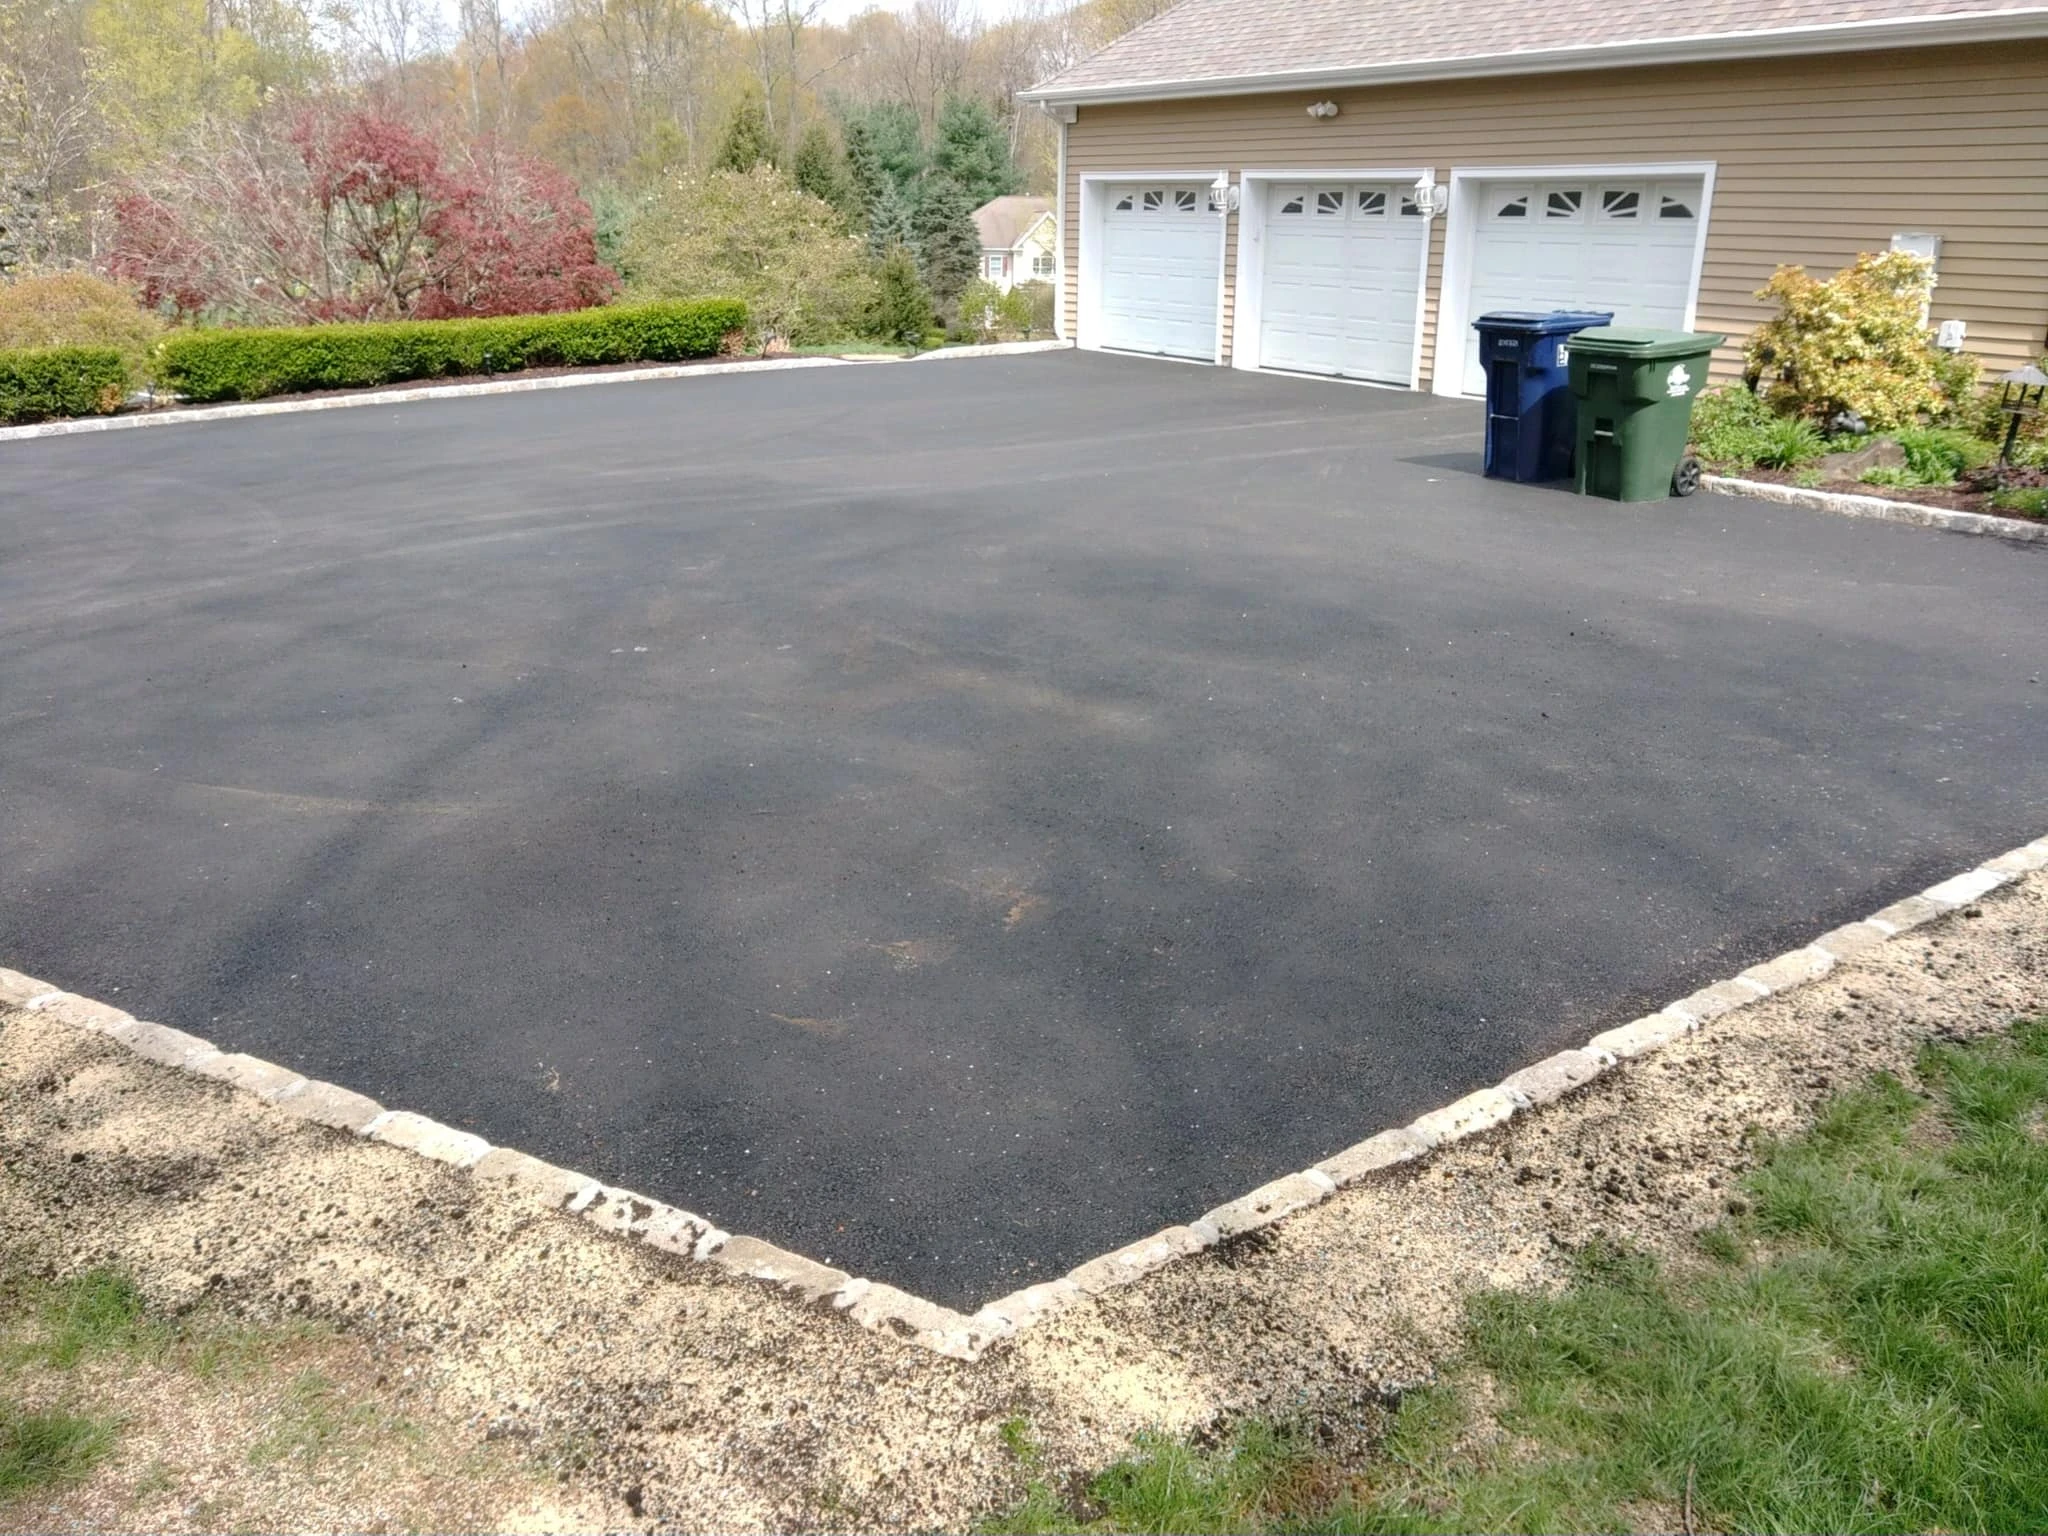
Photo courtesy of Yardgoats
Why proper backfilling is essential for structure and style
Backfilling is not a courtesy. It is the part that gives your edging strength and polish. Here is what happens when it is done right.
It stops movement before it starts
Compacted soil and gravel brace the blocks. Without that lateral support, stones lean when a tire brushes them or when a mower wheel rides up. Some installers also run a concrete haunch behind the blocks, pitched down and away from the stones. That hidden wedge acts like a shoulder that refuses to budge. Soil then covers the haunch so the top still looks natural. You do not need a haunch for every project, but it is common on long, straight runs and on driveways that see frequent plow contact.
It prevents erosion and washouts
An open trench is a perfect little channel. Water will follow it. When the trench is filled and compacted, water spreads across the surface instead of gouging along the edge. A gravel layer gives infiltration a place to go, and topsoil with grass or mulch shields the surface. That combination keeps the ground where it belongs.
It supports drainage and reduces frost heave
In Connecticut, repeated freeze thaw cycles can lift anything that traps water. Gravel creates pathways for water to move. Good compaction removes voids. A solid base under the stones and a graded top behind them cut down the chance of heave. Nothing is completely bulletproof in a tough winter, but a properly backfilled edge is far less likely to shift.
It discourages weeds and pests
Tightly packed soil leaves fewer nooks and crannies for weed seeds to catch. A mulched bed or healthy turf also shades soil and slows weed germination. You will still find the odd volunteer sprout by late summer, but it will be easier to pull and less likely to be entrenched.
It delivers the finished look you want
Backfilling brings the lawn or bed right up to the stone so the line looks continuous and clean. You do not see a raw lip of concrete or an ugly drop. The reveal is even, and the stone reads as part of the landscape, not as something recently installed.
Local factors in Connecticut and the New Fairfield area
Every property is different, but a few regional patterns show up again and again.
Freeze thaw cycles are real, so plan for them
When temperatures swing above and below freezing, water in the soil expands and contracts. If the trench behind your stones collects water, that expansion can push on the backs of the blocks. A gravel layer, solid compaction, and a slight slope away from the stones all help. In spring, do a simple walk through and check for any irregularities. If a single block sits proud, it can be reset before it becomes a bigger problem.
Soil types vary across short distances
Many New Fairfield properties have a mix of sandy loam with pockets of clay, plus the usual scatter of rocks. Clay holds water. Sandy soil drains fast and compacts less strongly unless you add moisture at the right moment. Adjust your backfill method to what you find. If the trench wall looks slick and gray, treat it like clay and be generous with drainage stone. If it looks loose and sandy, take your time with compaction and consider a concrete bed for extra security.
Seasonal timing matters
Mid spring through early fall is ideal. Concrete cures well, seed establishes quickly, and the ground is not frozen. Early fall can be a sweet spot because cool nights help grass seed and daytime temperatures are comfortable for outdoor work. If you finish late in the year, cover bare soil with straw or a light mulch and plan to seed once the ground warms.
Rocky terrain is a common surprise
You may hit ledge or a seam of cobbles. Reuse small stones in the deeper part of the trench if they fit tight and will not create voids. Pull out larger rocks that would reduce compaction or create water pockets. In any low section that tends to stay soggy, consider more gravel or even a short length of perforated pipe that drains to lower ground.
Finished versus unfinished edges, and why the finish changes everything
Imagine a driveway with a clean granite border. The lawn meets the stone without a gap. Only the upper four inches of the block shows. The grade rolls gently away. You can walk off the blacktop and your foot lands on firm turf without stepping down. That is what a finished edge looks like. It feels permanent and neat.
Now picture the unfinished version. The trench shows. Too much of the stone face is exposed, so the curb looks tall and awkward. You can spot the concrete bed in places. A few weeds have taken the invitation to settle into gaps. The mower wheel drops when it gets close, which leaves a scalped strip. That is the difference one afternoon of backfilling and grading makes.
If you only remember one thing, remember this. The last hour of work is what everyone notices for the next ten years.
Practical tips for homeowners, landscaping clients, and beginner gardeners
Here is a short list you can keep on your phone while you work.
- Budget for backfill materials. Two to four inches of gravel behind the stones, then good topsoil. Have extra soil on hand for touch ups after the first storm.
- Work in layers. Compact gently between lifts. Firm is the goal, not rock hard.
- Watch the reveal. Aim for roughly four inches of visible stone. Keep it consistent along the line.
- Mind the seam. If you cut back asphalt during installation, fill any front gap with stone dust or a dense mix so water cannot sneak under the pavement.
- Finish with seed or mulch. Bare soil invites erosion and weeds. Cover it the same day if you can.
- Check the forecast. Slightly moist soil compacts best. If a heavy rain is due tonight, protect new seed with straw so it does not wash.
- Plan for the first winter. Avoid scraping a plow directly against brand new edging. Set markers at the driveway edge so a contractor can see the line.
- Do a spring inspection. Look for small dips behind the stones. Add soil and reseed. If a single block has moved, reset it before summer.
- Keep it tidy. Once or twice a year, walk the border. Pull a few weeds, top off low spots, and brush off grit that collects on the stone face.
Common mistakes and how to avoid them
Even careful homeowners make a few predictable errors. Here is how to dodge them.
- Backfilling too soon. If concrete or mortar is still green, pressure from tamping can rack the stones. Wait a day at least, and longer if it is cool and damp.
- Skipping gravel in slow draining soils. Clay soils hold water. Without gravel, freeze thaw cycles are more likely to lift stones. If you see puddles near the trench after rain, you need drainage material.
- Over compaction near fresh stonework. Hammering a hand tamper right beside a new block can shift it. Compact in small lifts with firm, even pressure.
- Exposing too much of the stone. A tall reveal can look harsh and can catch plow blades. Bring the lawn grade up to a comfortable level and keep the visible height consistent.
- Leaving the seam at the asphalt open. Water that gets under blacktop will find a way to expand a small gap. Stone dust pressed into that seam solves the problem.
- Forgetting seasonal seeding windows. In Connecticut, late spring and early fall are better for seed. Mid summer works only if you can water consistently.
Tool notes, brand mentions, and small workflow hacks
If you like having a checklist of gear, here is a simple setup that works well for most properties.
- Hand tamper. A 10 by 10 inch steel tamper is inexpensive and reliable. If you have a long run, a small plate compactor is helpful, but for edging, a hand tamper is usually enough.
- Landscape rake. The wide head helps you shape grade quickly.
- Square spade. Handy for shaving high spots cleanly.
- Wheelbarrow and buckets. Easier than hauling bags one by one.
- String line and stakes. Keeps the reveal even. A line level is nice to have.
- Grass seed suited to southern New England. A tall fescue and Kentucky bluegrass blend is a good all around pick. Follow the rate on the bag.
- Marking tape or driveway markers. Set them before the first snow so a plow driver knows exactly where the stone line runs.
A quick seasonal playbook for Connecticut
- Late spring. Ideal for finishing backfill and seeding. Soil is workable, and seed germinates well. Water lightly as needed.
- Summer. Work early or late in the day. Keep fresh seed watered, or lay straw to shade it. Watch for thunderstorms that can wash loose soil.
- Early fall. Excellent window for a new lawn edge. Cool nights and warm days help seed establish. This is a favorite time for many contractors.
- Late fall. Finish soil work and cover with straw if you cannot seed until spring. Set driveway markers before the first plow.
- Winter. Avoid pushing blades into the stone. After thaws, check for areas where meltwater is finding a path along the edge. Note those spots for spring touch ups.
- Early spring. Inspect for heave or settlement. Reseat any blocks that shifted and refresh seed where needed.
Frequently asked questions
Do I need concrete under Belgian blocks for a driveway edge
Not always, but it helps in regions with frequent freeze thaw cycles, and it is common in Connecticut. A rigid bed with a compacted gravel base, plus a small concrete haunch behind the stones, creates a very stable edge. Dry set can work when the base is excellent and drainage is strong, but it is less forgiving.
How high should the blocks show once everything is finished
Aim for about four inches of visible face. Keep it consistent along the entire run. That height looks right and avoids most mower or plow issues.
What if my soil is heavy clay
Use more gravel behind the stones and take extra care with compaction. Shape the topsoil so it slopes slightly away from the stones. If a section stays soggy, consider adding a short perforated pipe that drains to a lower point.
Can I seed right after I finish backfilling
Yes. If the weather is mild and you can water lightly for a couple of weeks, seed will establish well. If you finish late in fall, cover with straw and seed in spring.
How do I keep weeds out of the joints
Brush stone dust into joints, then mist lightly. Maintain a tight grade against the stones and keep the lawn healthy. A few hand pulls during summer usually handles the rest.
Conclusion and homeowner checklist
Belgian blocks make a driveway look composed and sturdy. Backfilling is the step that turns a line of stones into a functional curb with real staying power. It holds the blocks steady, keeps water moving, resists frost heave, and gives you that crisp, magazine worthy edge that neighbors notice.
Here is your short checklist.
- Let concrete cure before you touch the trench.
- Place two to four inches of gravel behind the stones.
- Backfill with topsoil in compacted layers.
- Keep the reveal close to four inches and consistent.
- Fill the seam at the asphalt with stone dust or a dense mix.
- Seed or mulch the same day you finish the grade.
- Inspect after the first heavy rain and again in spring.
- Touch up settlement with fresh soil, then reseed.
Honestly, the last few steps can feel small, almost tedious. You know what, though, they are the steps that make your project look finished. With a little patience and the right materials, your Belgian block edge will hold tight through winter, look sharp in summer, and give your home a clean frame for years to come.